Learn exactly what the best way to store raspberries is in this article! Raspberries are a delicious and nutritious fruit that can be enjoyed year-round when properly frozen and stored. And nothing beats the taste of homegrown frozen raspberries! I'll teach you exactly what the best way to freeze and store raspberries is!
In this article, I'll explore the benefits of freezing and storing raspberries, as well as provide a step-by-step guide on how to freeze them.
The Benefits of Freezing and Storing Raspberries
Gardeners and berry enthusiasts alike understand the struggle of dealing with an abundance of fresh raspberries.
Fortunately, freezing and storing raspberries not only allows you to enjoy their delightful flavor year-round but also ensures that no berry goes to waste.
By freezing raspberries at their peak ripeness, you can lock in their freshness and nutritional value.
Moreover, freezing extends the shelf life of raspberries, allowing you to enjoy them well beyond their traditional harvesting season. My article shares the best way to store raspberries so that you have access to the juiciest raspberries all the time!
How to Prepare and Select Raspberries for Storing and Freezing
Before freezing raspberries, it's crucial to ensure that they are in their best condition. Start by selecting ripe raspberries that are firm, plump, and free from any mold or bruises.
Raspberries come in various colors, including red, black, purple, and golden. Each color has its own unique flavor profile, with red raspberries being the most common and widely available.
When choosing raspberries, look for ones that have a vibrant color and a sweet aroma. These are signs of a ripe and flavorful berry.
It's best to pick raspberries in the early morning when they are cool to maintain their freshness. Raspberries are delicate fruits that can easily become damaged in hot weather.
By picking them in the morning, you ensure that they are at their peak quality. The cool temperature also helps to preserve their natural sweetness and juiciness.
A few hours before freezing, turn down the thermostat to 0 – degrees F to freeze fresh produce quickly so it’s not so mushy when it gets thawed (then don’t forget to turn the freezing temperature back to normal).
During cold winter months or non-raspberry harvest time, you can make a tasty recipe out of your own homegrown berries.
Step-by-Step Guide to the Best Way to Store Raspberries
Storing and freezing strawberries is super simple, here's everything you'll need and what you need to do:
Supplies You'll Need
You Will Need:
- Freezing plastic/glass containers of your choice
- Freshly picked raspberries
Freezing raspberries is a great way to preserve their freshness and enjoy them all year round. Whether you have an abundance of raspberries from your garden or you found a great deal at the farmers market, freezing them is a simple process that will ensure you can enjoy their sweet and tangy flavor even when they are out of season.
Follow this step-by-step guide to learn how to freeze raspberries.
How to Freeze Strawberries Step-by-Step
Step 1: Wash raspberries under cool water and pat them dry.
Before freezing raspberries, it's important to give them a good wash to remove any dirt or debris. Place the raspberries in a colander and rinse them under cool running water. Gently pat them dry with a clean kitchen towel or paper towels. Be careful not to crush the delicate berries.
Step 2: Remove any stems or leaves.
After washing the raspberries, take a moment to remove any stems or leaves that may still be attached. This step is important to ensure that only the ripe berries are frozen, as stems and leaves can affect the texture and taste of the frozen raspberries.
Step 3: Spread raspberries in a single layer on a lined baking sheet.
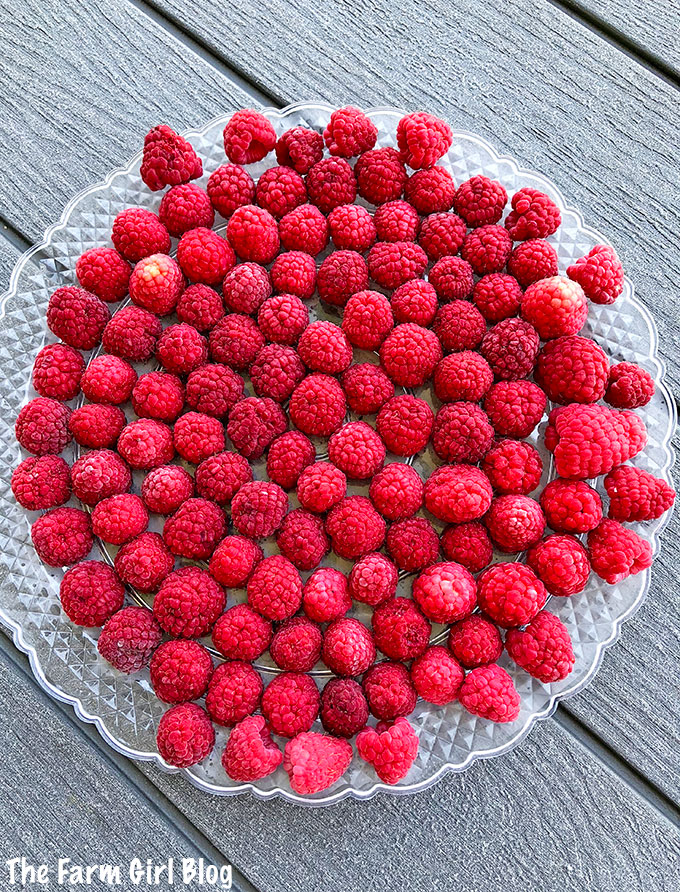
Next, prepare a baking sheet by lining it with parchment paper or a silicone baking mat. This will prevent the raspberries from sticking to the surface and make it easier to transfer them once frozen. Spread the raspberries in a single layer on the lined baking sheet, making sure they are not touching each other. This will allow them to freeze individually and prevent them from clumping together.
Step 4: Place the baking sheet in the freezer for a few hours.
Once the raspberries are arranged on the baking sheet, carefully place it in the freezer. It's best to choose a flat surface in the freezer where the baking sheet can sit undisturbed. Leave the raspberries in the freezer for a few hours or until they are completely frozen. Freezing time may vary depending on the temperature of your freezer.
Step 5: Transfer frozen raspberries to freezer-safe containers or bags.
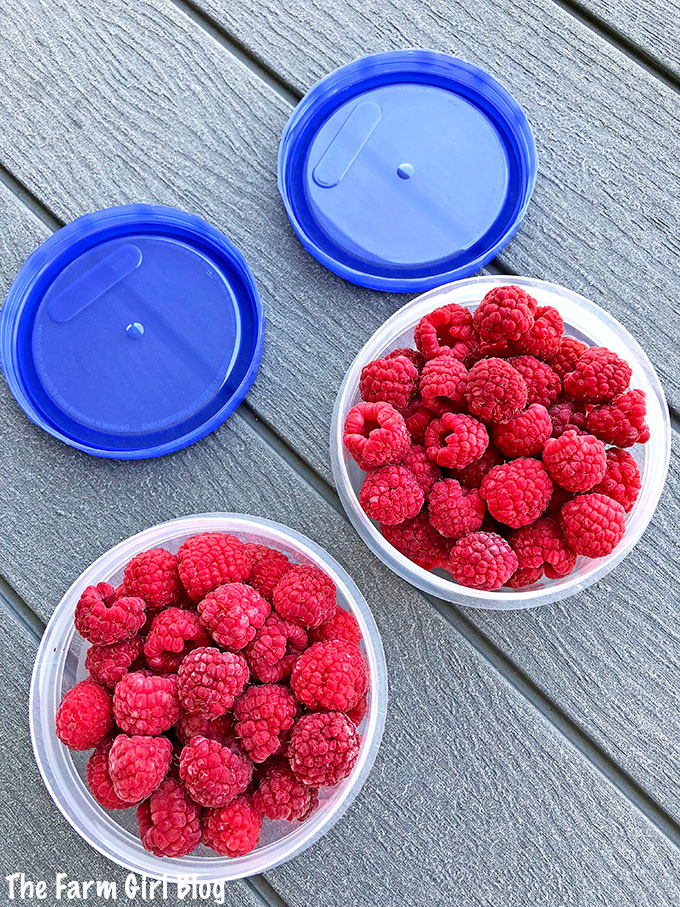
Once the raspberries are frozen solid, it's time to transfer them to freezer-safe containers or bags. These containers should be airtight to prevent freezer burn and maintain the quality of the raspberries. You can use plastic freezer bags or rigid containers specifically designed for freezing. Make sure to choose a size that suits your needs, whether you prefer to freeze small portions or larger quantities.
Step 6: Label the containers with the date and contents.
Before sealing the containers, don't forget to label them with the date and contents. This will help you keep track of how long the raspberries have been in the freezer and make it easier to identify them later. Use a permanent marker or labels to write the necessary information on each container.
These raspberries can stay in the freezer until you harvest new fruit the next year. Just take one container out of the freezer and make the recipe of your choice.
Now that you know how to freeze raspberries, you can enjoy their vibrant flavor and nutritional benefits throughout the year. Whether you add them to smoothies, bake them into pies, or simply enjoy them as a frozen treat, frozen raspberries are a versatile ingredient that can elevate any dish. So go ahead and stock up on raspberries when they are in season, freeze them following these steps, and savor the taste of summer all year long!
How to Use Frozen Raspberries in Recipes
Now that you know the best way to store raspberries, let's consider how to use them!
Frozen raspberries are incredibly versatile and can be used in a variety of delicious recipes. Whether you're making smoothies, jams, pies, or sauces, frozen raspberries can add a burst of flavor and vibrant color to your culinary creations.
One popular way to use frozen raspberries is in smoothies. Simply blend the thawed raspberries with your favorite fruits, yogurt, and a splash of juice for a refreshing and nutritious drink. It also works great for raspberry lemonades!
If you're in the mood for something sweet, frozen raspberries can be transformed into a delicious jam. Simmer the thawed raspberries with sugar and a squeeze of lemon juice until thickened. Spread this homemade jam on toast, scones, or use it as a filling for pastries.
For those who enjoy baking, frozen raspberries can be a delightful addition to pies and tarts. Mix the thawed raspberries with sugar, cornstarch, and a pinch of cinnamon before pouring the mixture into a pie crust. The raspberries will release their juices as they bake, creating a luscious filling that pairs perfectly with a flaky crust.
If you're feeling adventurous, try using frozen raspberries to make a tangy raspberry sauce. Simmer the thawed raspberries with sugar and a splash of water until the mixture thickens. This versatile sauce can be drizzled over pancakes, waffles, or even used as a topping for cheesecake.
The Best Way to Store Raspberries (How to Freeze and Store)
Materials
You Will Need
- Freezing plastic/glass containers of your choice
- Freshly picked raspberries
Instructions
How to Freeze Strawberries Step-by-Step
Step 1: Wash raspberries under cool water and pat them dry.
- Before freezing raspberries, it's important to give them a good wash to remove any dirt or debris. Place the raspberries in a colander and rinse them under cool running water. Gently pat them dry with a clean kitchen towel or paper towels. Be careful not to crush the delicate berries.
Step 2: Remove any stems or leaves.
- After washing the raspberries, take a moment to remove any stems or leaves that may still be attached. This step is important to ensure that only the ripe berries are frozen, as stems and leaves can affect the texture and taste of the frozen raspberries.
Step 3: Spread raspberries in a single layer on a lined baking sheet.
- Next, prepare a baking sheet by lining it with parchment paper or a silicone baking mat. This will prevent the raspberries from sticking to the surface and make it easier to transfer them once frozen. Spread the raspberries in a single layer on the lined baking sheet, making sure they are not touching each other. This will allow them to freeze individually and prevent them from clumping together.
Step 4: Place the baking sheet in the freezer for a few hours.
- Once the raspberries are arranged on the baking sheet, carefully place it in the freezer. It's best to choose a flat surface in the freezer where the baking sheet can sit undisturbed. Leave the raspberries in the freezer for a few hours or until they are completely frozen. Freezing time may vary depending on the temperature of your freezer.
Step 5: Transfer frozen raspberries to freezer-safe containers or bags.
- Once the raspberries are frozen solid, it's time to transfer them to freezer-safe containers or bags. These containers should be airtight to prevent freezer burn and maintain the quality of the raspberries. You can use plastic freezer bags or rigid containers specifically designed for freezing. Make sure to choose a size that suits your needs, whether you prefer to freeze small portions or larger quantities.
Step 6: Label the containers with the date and contents.
- Before sealing the containers, don't forget to label them with the date and contents. This will help you keep track of how long the raspberries have been in the freezer and make it easier to identify them later. Use a permanent marker or labels to write the necessary information on each container.




Leave a Reply