Planting garlic in the fall is a wise decision for any gardener who wants to enjoy a bountiful harvest come spring. Unlike other crops, garlic requires a long period of cold weather in order to develop fully.

By planting garlic in the fall, you allow it to establish its roots and undergo the necessary dormancy period before the onset of winter.
In this article, I will share all the reasons why fall is the ideal time to plant garlic. You’ll learn how to plant it properly, understand the winter maintenance required, and discover some valuable tips for successful garlic cultivation.
Table of Contents
Why You Should Plant Garlic in the Fall
Fall planting provides numerous benefits for garlic cultivation. Firstly, it allows the garlic cloves to develop strong and healthy root systems before the ground freezes. This ensures better nutrient uptake and overall plant vigor.
When garlic cloves are planted in the fall, they have ample time to establish themselves in the soil. As the temperatures cool down, the cloves begin to send out roots, anchoring themselves firmly in the ground.
These roots act as a lifeline for the garlic plant, absorbing essential nutrients and moisture from the soil. With a well-developed root system, the garlic plant is better equipped to withstand the harsh winter conditions.
Moreover, fall planting gives garlic a head start in terms of growth and development. While other garden plants are going dormant or preparing for the winter, garlic planted in the fall is already establishing itself.
This early start allows the garlic plant to allocate its energy towards producing strong and healthy leaves, which in turn leads to larger and more robust bulbs in the following year.
Another advantage of planting garlic in the fall is the natural suppression of weeds during winter. As temperatures drop and the ground freezes, weed growth slows down significantly. This means that garlic planted in the fall has a cleaner growing environment, with fewer competing plants to steal nutrients and sunlight.
This reduced weed pressure allows the garlic to thrive and focus its energy on bulb development, resulting in higher yields.
Furthermore, fall planting provides an opportunity to take advantage of the natural cycles of the soil. As the garlic cloves are nestled in the ground, they interact with the soil microorganisms and beneficial fungi.

How to Plant Garlic in the Fall
Planting garlic in the fall requires a few simple steps to ensure success. Let’s look at it in detail:
1. Select a High-Quality Seed
The first crucial aspect is selecting high-quality seed. Start by choosing large, healthy garlic bulbs from a reputable source. These bulbs will produce the best cloves for planting. Look for bulbs that are firm and have no signs of mold or disease. The outer skin should be intact and papery, indicating that the garlic is fresh and has not been exposed to moisture.
2. Prepare the Cloves
Next, carefully separate the cloves from the bulb, making sure not to damage them. Each clove will develop into a separate garlic plant. It's important to handle the cloves with care to avoid bruising or breaking them. If a clove is damaged, it may not grow properly or may be more susceptible to diseases and pests.
3. Find and Prepare the Location
Prepare a sunny location in your garden by clearing away any weeds or debris. Garlic thrives in well-drained soil, so enrich it with organic matter such as compost to improve its fertility and drainage. This will provide the garlic plants with the nutrients they need to grow and develop strong roots. Additionally, adding compost will help retain moisture in the soil, reducing the need for frequent watering.
4. Dig a Trench
Dig a small trench or individual holes, spacing them 4-6 inches apart. The spacing is important to give each garlic plant enough room to grow and develop a healthy bulb. If the plants are too crowded, they may not receive enough sunlight or air circulation, which can lead to disease and stunted growth.
5. Plant the Garlic
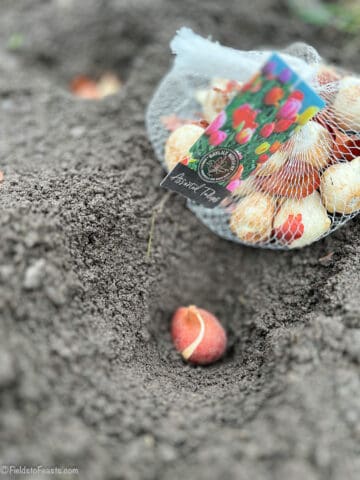
Plant each garlic clove with the pointed end facing upwards and bury it approximately 2 inches deep. This orientation ensures that the shoot will emerge from the top of the clove, while the roots develop from the bottom. If the clove is planted upside down, the shoot will have to make a U-turn to reach the surface, which can hinder its growth.
6. Water Thoroughly
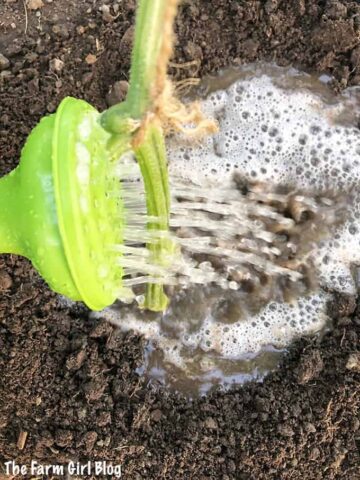
After planting, cover the cloves with soil and water thoroughly. It's important to provide enough moisture to help the cloves establish roots and begin growing. However, be careful not to overwater, as garlic prefers well-drained soil. Excessive moisture can lead to rot and other fungal diseases.
7. Apply a Layer of Mulch
Applying a layer of mulch, such as straw or shredded leaves, will help to maintain consistent soil moisture and temperature. Mulch acts as a protective barrier, preventing weeds from competing with the garlic plants for nutrients and sunlight. It also helps to regulate soil temperature, keeping it cooler in the summer and warmer in the winter.
8. Monitor Moisture Levels
Throughout the fall and winter, monitor the moisture levels in the soil and water as needed. Garlic requires consistent moisture, but be cautious not to water excessively, as this can lead to waterlogged soil and root rot. In colder regions, consider covering the garlic bed with a layer of straw or frost cloth to protect the plants from harsh winter conditions.
9. Remove Scrapes in Spring
As spring approaches, you will notice the garlic plants starting to grow. They will produce long, slender leaves that eventually curl and form scapes. These scapes can be harvested and used in cooking, providing a mild garlic flavor. However, removing the scapes will redirect the plant's energy towards bulb development, resulting in larger garlic bulbs.
10. Harvest Your Garlic
Harvesting time varies depending on the garlic variety and growing conditions. Generally, garlic is ready to harvest when the lower leaves turn yellow and start to dry out. Carefully dig up the bulbs, taking care not to damage them. Allow the garlic to cure in a cool, dry, and well-ventilated area for a few weeks before storing it in a cool, dark place.
By following these steps and providing the necessary care, you can enjoy a bountiful harvest of flavorful garlic in the fall. Whether you use it in your favorite recipes or share it with friends and family, growing garlic can be a rewarding experience for any gardener.

Winter Maintenance for Garlic
During the winter months, garlic enters a period of dormancy where its growth slows down significantly. While garlic does not require as much care during this time, there are still a few important tasks to keep in mind to ensure the health and productivity of your garlic plants.
One crucial aspect to monitor during the winter is the soil moisture levels. Although garlic prefers a slightly moist soil, it is essential to strike a balance and avoid overwatering.
Overwatering can lead to saturated soil, which creates the perfect conditions for rot to develop. So, it is important to pay attention to the weather conditions and water the plants only if the soil becomes dry.
In addition to monitoring soil moisture, gardeners in areas with severe winter temperatures should take extra precautions to protect their garlic plants from the harsh elements. One effective method is to cover the garlic beds with a layer of mulch or row cover. This additional insulation helps to shield the plants from freezing temperatures and potential frost damage.
When choosing a mulch material, consider using organic options such as straw, leaves, or compost. These materials not only provide insulation but also help to retain soil moisture and suppress weed growth. Apply a layer of mulch around 4-6 inches thick, ensuring that the garlic plants are well-covered.
Similarly, a row cover can be used to protect the garlic plants from freezing temperatures. Row covers are lightweight fabrics that allow sunlight, air, and water to reach the plants while providing a barrier against cold winds.
Secure the row cover over the garlic beds, ensuring that it is held firmly in place to prevent it from being blown away by strong winds.
Tips for Growing Garlic in the Fall
Garlic, with its pungent aroma and distinct flavor, is a staple ingredient in many culinary dishes. Growing garlic in the fall is a rewarding experience that offers many benefits for the dedicated gardener.
Not only does it provide a fresh supply of this versatile vegetable, but it also allows you to enjoy the satisfaction of cultivating your own food. If you're ready start growing garlic, here are some tips to help you get started:
1. Start with Great Seed
Choosing healthy, large garlic bulbs as your seed stock is crucial. These bulbs serve as the foundation for your garlic crop, so it's essential to select ones that are free from disease and have a firm texture. By starting with high-quality seed, you ensure the highest quality cloves for planting.
2. Plant Bigger Cloves
When selecting cloves from your garlic bulbs, opt for larger ones. These cloves have more stored energy and are more likely to produce robust plants. By planting bigger cloves, you give your garlic a head start in its growth journey.
3. Prepare the Growing Location for Success
Garlic thrives in well-drained soil with plenty of organic matter. Before planting, clear the designated area of any weeds or debris. This step ensures that your garlic plants won't have to compete with unwanted vegetation for nutrients and sunlight. Additionally, enriching the soil with organic matter, such as compost or well-rotted manure, creates optimal growing conditions for garlic.
4. Pre-Soak the Cloves
Soaking the garlic cloves in water for a few hours before planting can enhance their moisture content and stimulate germination. This simple step gives your garlic a head start by providing the necessary hydration for the cloves to sprout and establish roots.
5. Plant in Trenches with Compost
To boost nutrient availability, consider planting your garlic in trenches filled with compost. This organic matter nourishes the plants as they grow, promoting healthy development and ensuring a bountiful harvest. The compost also helps retain moisture in the soil, reducing the need for frequent watering.
6. Provide Adequate Watering
While garlic is relatively low-maintenance, it still requires regular watering. During the fall and winter months, when rainfall may be scarce, it's important to monitor the moisture levels in the soil. Aim to keep the soil consistently moist, but not waterlogged, to prevent rot and promote healthy growth.
7. Mulch for Protection
Applying a layer of mulch around your garlic plants can provide insulation and protect them from extreme temperature fluctuations. Mulch also helps suppress weed growth, conserves moisture, and adds organic matter to the soil as it breaks down.
8. Monitor for Pests and Diseases
Like any plant, garlic is susceptible to pests and diseases. Keep a close eye on your plants and watch for signs of trouble, such as yellowing leaves, wilting, or insect damage. If necessary, take appropriate measures to control pests or diseases, such as using organic insecticides or fungicides.
9. Harvest at the Right Time
Garlic is typically ready for harvest when the lower leaves start to turn yellow and dry out. Carefully dig up the bulbs, taking care not to damage them. Once harvested, allow the garlic to dry in a well-ventilated area for a few weeks before storing.
10. Enjoy the Fruits of Your Labor
After all your hard work and patience, it's time to savor the rewards. Use your homegrown garlic in a variety of dishes, from homemade pasta sauces to roasted vegetables. The flavor and freshness of homegrown garlic will elevate your culinary creations to new heights.
By following these tips and techniques, you'll be well on your way to becoming a successful fall garlic grower. Remember to start with high-quality seed, prepare the planting location diligently, and provide the necessary care during winter.
With dedication and a little bit of patience, you can cultivate a thriving garlic crop that will yield abundant harvests in the coming year.

See Similar Post You'll Love
See all gardening posts.
Planting Garlic In The Fall: Why and How To Do It
Equipment
- Garlic cloves
Instructions
Select a High-Quality Seed
- The first crucial aspect is selecting high-quality seed. Start by choosing large, healthy garlic bulbs from a reputable source. These bulbs will produce the best cloves for planting. Look for bulbs that are firm and have no signs of mold or disease. The outer skin should be intact and papery, indicating that the garlic is fresh and has not been exposed to moisture.
Prepare the Cloves
- Next, carefully separate the cloves from the bulb, making sure not to damage them. Each clove will develop into a separate garlic plant. It's important to handle the cloves with care to avoid bruising or breaking them. If a clove is damaged, it may not grow properly or may be more susceptible to diseases and pests.
- Find and Prepare the Location
- Prepare a sunny location in your garden by clearing away any weeds or debris. Garlic thrives in well-drained soil, so enrich it with organic matter such as compost to improve its fertility and drainage. This will provide the garlic plants with the nutrients they need to grow and develop strong roots. Additionally, adding compost will help retain moisture in the soil, reducing the need for frequent watering.
Dig a Trench
- Dig a small trench or individual holes, spacing them 4-6 inches apart. The spacing is important to give each garlic plant enough room to grow and develop a healthy bulb. If the plants are too crowded, they may not receive enough sunlight or air circulation, which can lead to disease and stunted growth.
Plant the Garlic
- Plant each garlic clove with the pointed end facing upwards and bury it approximately 2 inches deep. This orientation ensures that the shoot will emerge from the top of the clove, while the roots develop from the bottom. If the clove is planted upside down, the shoot will have to make a U-turn to reach the surface, which can hinder its growth.
Water Thoroughly
- After planting, cover the cloves with soil and water thoroughly. It's important to provide enough moisture to help the cloves establish roots and begin growing. However, be careful not to overwater, as garlic prefers well-drained soil. Excessive moisture can lead to rot and other fungal diseases.
Apply a Layer of Mulch
- Applying a layer of mulch, such as straw or shredded leaves, will help to maintain consistent soil moisture and temperature. Mulch acts as a protective barrier, preventing weeds from competing with the garlic plants for nutrients and sunlight. It also helps to regulate soil temperature, keeping it cooler in the summer and warmer in the winter.
Monitor Moisture Levels
- Throughout the fall and winter, monitor the moisture levels in the soil and water as needed. Garlic requires consistent moisture, but be cautious not to water excessively, as this can lead to waterlogged soil and root rot. In colder regions, consider covering the garlic bed with a layer of straw or frost cloth to protect the plants from harsh winter conditions.
Remove Scrapes in Spring
- As spring approaches, you will notice the garlic plants starting to grow. They will produce long, slender leaves that eventually curl and form scapes. These scapes can be harvested and used in cooking, providing a mild garlic flavor. However, removing the scapes will redirect the plant's energy towards bulb development, resulting in larger garlic bulbs.
Harvest Your Garlic
- Harvesting time varies depending on the garlic variety and growing conditions. Generally, garlic is ready to harvest when the lower leaves turn yellow and start to dry out. Carefully dig up the bulbs, taking care not to damage them. Allow the garlic to cure in a cool, dry, and well-ventilated area for a few weeks before storing it in a cool, dark place.
- By following these steps and providing the necessary care, you can enjoy a bountiful harvest of flavorful garlic in the fall. Whether you use it in your favorite recipes or share it with friends and family, growing garlic can be a rewarding experience for any gardener.
Thank you for following me on Facebook, Instagram, and Pinterest!


Leave a Reply